Program a Machine
You can write code to control your machines using the following software development kits (SDKs):
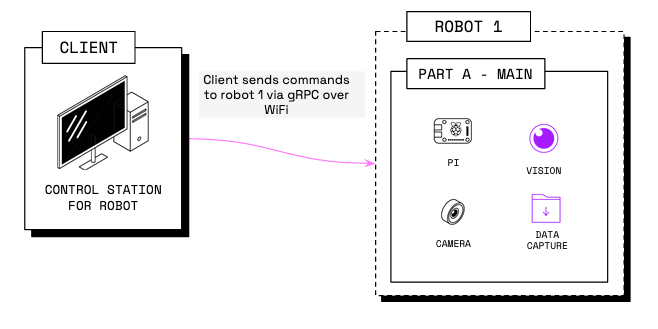
The SDKs provide idiomatic wrappers around Viam’s robot gRPC APIs.

Requirements
Before you get started with your program, ensure that you have installed viam-server on the computer you want to use to control your machine (likely a single-board computer), and configured your machine.
Next, to install your preferred Viam SDK on your Linux or macOS development machine or single-board computer, run one of the following commands in your terminal:
If you are using the Python SDK, set up a virtual environment to package the SDK inside before running your code, avoiding conflicts with other projects or your system.
For macOS (both Intel x86_64 and Apple Silicon) or Linux (x86, aarch64, armv6l), run the following commands:
python3 -m venv .venv
source .venv/bin/activate
pip install viam-sdk
Windows is not supported. If you are using Windows, use the Windows Subsystem for Linux (WSL) and install the Python SDK using the preceding instructions for Linux. For other unsupported systems, see Installing from source.
If you intend to use the ML (machine learning) model service, use the following command instead, which installs additional required dependencies along with the Python SDK:
pip install 'viam-sdk[mlmodel]'
go get go.viam.com/rdk/robot/client
npm install @viamrobotics/sdk
Info
The TypeScript SDK currently only supports building web browser apps.
Follow the instructions on the GitHub repository.
flutter pub add viam_sdk
Hello world: the CONNECT tab
Create a program in the language of your choice to connect to your machine and use methods built into the SDK’s client API libraries to interact with and control the resources on the machine.
Start by navigating to your machine’s page on the Viam app. Select the CONNECT tab and Code sample page, select your preferred programming language, and copy the code generated for you from the corresponding SDK.
Your boilerplate code sample should look similar to this:
Save this file on your development machine with the file type of your preferred SDK.
This code sample contains the required imports and logic to establish a connection between your client application and your machine’s viam-server instance and interface with its configured components and services.
The connection section of the boilerplate code contains your machine’s address and a placeholder for the API key.
Authenticate
To authenticate yourself to your machine, you need
The machine part’s API key:
To authenticate, use a machine part API key or an API key with access to the machine. Copy and paste the API key ID and the API key into your environment variables or directly into the code:
async def connect():
    opts = RobotClient.Options.with_api_key(
        # Replace "<API-KEY>" (including brackets) with your machine's API key
        api_key='<API-KEY>',
        # Replace "<API-KEY-ID>" (including brackets) with your machine's API key
        # ID
        api_key_id='<API-KEY-ID>'
    )
    return await RobotClient.at_address('ADDRESS FROM THE VIAM APP', opts)
robot, err := client.New( context.Background(), "ADDRESS FROM THE VIAM APP", logger, client.WithDialOptions(rpc.WithEntityCredentials( // Replace "<API-KEY-ID>" (including brackets) with your machine's API key ID "<API-KEY-ID>", rpc.Credentials{ Type: rpc.CredentialsTypeAPIKey, // Replace "<API-KEY>" (including brackets) with your machine's API key Payload: "<API-KEY>", })), )// Replace with the host of your actual machine running Viam. const host = "ADDRESS FROM THE VIAM APP"; const robot = await VIAM.createRobotClient({ host, credential: { type: "api-key", // Replace "<API-KEY>" (including brackets) with your machine's API key payload: "<API-KEY>", }, // Replace "<API-KEY-ID>" (including brackets) with your machine's API key ID authEntity: "<API-KEY-ID>", signalingAddress: "https://app.viam.com:443", });std::string host("ADDRESS FROM THE VIAM APP"); DialOptions dial_opts; dial_opts.set_type("api-key"); // Replace "<API-KEY-ID>" with your machine's API key ID dial_opts.set_entity("<API-KEY-ID>"); // Replace "<API-KEY>" with your machine's API key Credentials credentials("<API-KEY>"); dial_opts.set_credentials(credentials); boost::optional<DialOptions> opts(dial_opts); Options options(0, opts); auto robot = RobotClient::at_address(host, options);Future<void> connectToViam() async { const host = 'ADDRESS FROM THE VIAM APP'; // Replace '<API-KEY-ID>' (including brackets) with your API key ID const apiKeyID = '<API-KEY-ID>'; // Replace '<API-KEY>' (including brackets) with your API key const apiKey = '<API-KEY>'; final robot = await RobotClient.atAddress( host, RobotClientOptions.withApiKey(apiKeyId, apiKey), ); print(robot.resourceNames); }
Caution
Do not share your machine part API key or machine address publicly. Sharing this information could compromise your system security by allowing unauthorized access to your machine, or to the computer running your machine.
Location secret (deprecated)
Prior to API keys, Viam used location secrets for authentication. Location secrets are now deprecated. To avoid connection issues, start using API keys.
The machine’s remote address:
Include the address, which resembles
12345.somemachine-main.viam.cloud. The machine address is a public address to connect to your machine. You can find this address at the top of the machine’s CONTROL tab or on the CONNECT tab’s Code sample page.
Apps with authentication
If you need to build apps with custom login flows, contact us.
Run the sample code
Once you have saved the sample code, execute your program.
You can run your program on any computer which:
- has the appropriate SDK installed
- can establish a connection to your machine through the cloud, on a local or wide area network (LAN or WAN), or locally
The program will connect to your machine and print a list of the available resources.
Edit the sample code
Once you have successfully run the sample code, you can edit the boilerplate code by adding control logic to make a client application that connects to your machine and controls it in the way you want. You can find the right libraries to import for SDK methods, typing, interfaces, and utilities at the start of each resource’s API documentation, as well as in the individual SDK documentation sites and on GitHub.
Was this page helpful?
Glad to hear it! If you have any other feedback please let us know:
We're sorry about that. To help us improve, please tell us what we can do better:
Thank you!