# Configure a Rover like Yahboom or SCUTTLE
Configure a rover like the a Yahboom 4WD Rover or a SCUTTLE robot on the Viam platform.
> Source: https://docs.viam.com/tutorials/configure/configure-rover/ · Last updated: 2024-04-17
This tutorial will guide you through configuring a rover.
If you are using a SCUTTLE, a Yahboom rover, or a different rover, this tutorial covers instructions for your rover model.
> **Viam Rover:**
>
>
> If you are using a Viam Rover, use the [Viam Rover tutorial fragment](/try/viam-rover/fragments/) instead.
>
## Requirements
- A running an instance of `viam-server`.
See our [Installation Guide](/set-up-a-machine/first-machine/) for instructions.
- A rover like the [SCUTTLE robot](https://www.scuttlerobot.org/shop/) or the Yahboom 4WD Smart Robot.
Make sure your rover is assembled before starting this tutorial.
## Start configuring your robot
Add a new machine on [Viam](https://app.viam.com).
On the machine's page, follow the {{< glossary_tooltip term_id="setup" text="setup instructions" >}} to install `viam-server` on the computer you're using for your project.
Wait until your machine has successfully connected to Viam.
Once connected, navigate to the machine's **CONFIGURE** tab.
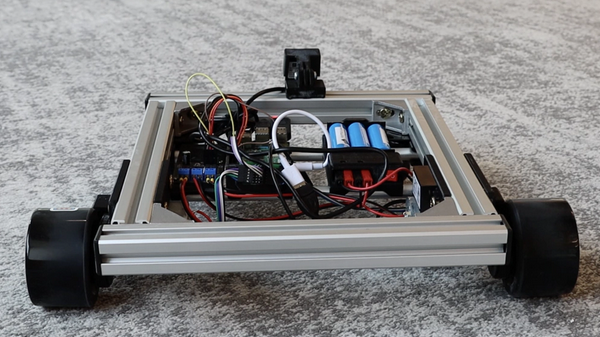
The configuration for each rover is different depending on which [components](/reference/glossary/#term-component)
your rover is composed of.
In the following, you can see two popular examples with components that are present on most rovers:
## Configure the board
The first component you will add is the [board](/reference/components/board/) which represents the Raspberry Pi to which the other components are wired.
Click the **+** icon next to your machine part in the left-hand menu and select **Blocks**.
Search for `raspberry pi`, then select the `raspberry-pi/rpi` block.
Enter `local` as the name and click **Add to machine**.
You can use a different name but will then need to adjust the name in the following steps to the name you choose.
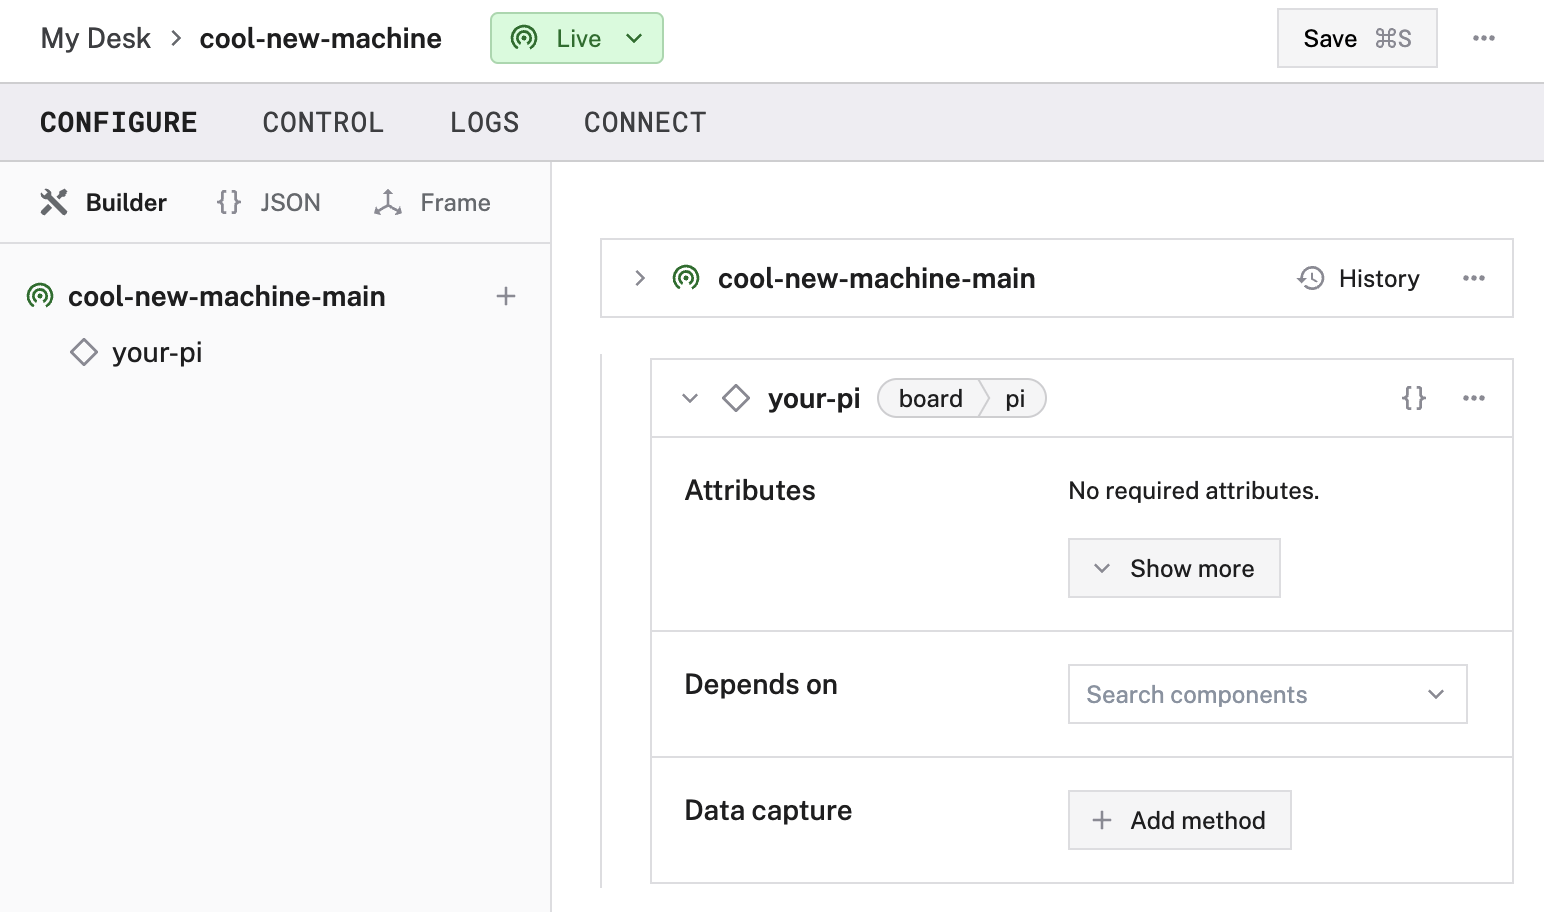
You don't need to add any attributes for your board.
## Configuring the motors and encoders
### Configure the encoders
> **Note:**
>
>
> Not all rovers require the configuration of encoders.
> If your motors work without encoders, skip to [configuring your motors](#configure-the-motors).
>
Configure the left and right encoders as follows:
### SCUTTLE
Config Builder
Start with the right encoder:
Right encoder
Click the **+** icon next to your machine part in the left-hand menu and select **Blocks**.
Search for `as5048`, then select the `ams/as5048` block.
Enter `renc` as the name and click **Add to machine**.
Click the **board** dropdown list and select the name of your board, `local`.
In the **i2c bus** field type `1`, and in the **i2c address** field type `65`.
Left encoder
Click the **+** icon next to your machine part in the left-hand menu and select **Blocks**.
Search for `as5048`, then select the `ams/as5048` block.
Enter `lenc` as the name for your encoder and click **Add to machine**.
Click the **board** dropdown list and select the name of your board, `local`.
In the **i2c bus** field type `1`, and in the **i2c address** field type `64`.
JSON
Add the following JSON objects to the `components` array:
```json
{
"name": "lenc",
"api": "rdk:component:encoder",
"model": "viam:ams:as5048",
"attributes": {
"connection_type": "i2c",
"i2c_attributes": {
"i2c_bus": "1",
"i2c_addr": 64
}
}
},
{
"name": "renc",
"api": "rdk:component:encoder",
"model": "viam:ams:as5048",
"attributes": {
"connection_type": "i2c",
"i2c_attributes": {
"i2c_bus": "1",
"i2c_addr": 65
}
}
}
```
### Other
Follow the instructions for the [model of encoder](/reference/components/encoder/) your rover uses to configure your encoders and configure at least a `right` and a `left` encoder.
### Configure the motors
### SCUTTLE
Config Builder
Start with the right motor:
Right motor
Click the **+** icon next to your machine part in the left-hand menu and select **Blocks**.
Search for `gpio`, then select the `motor/gpio` block.
Enter `right` as the name or use the suggested name for your motor and click **Add to machine**.
Then from the **Board** dropdown, select `local`, the Raspberry Pi the motor is wired to.
Select `Encoded` in the **Encoder** section and select `renc` as the **encoder** and set **ticks per rotation** to `2`.
Next, describe how the motor is wired to the Pi:
Switch the Component Pin Assignment Type to `In1/In2`.
Set **A/In1** to `16`.
Set **B/In2** to `15`.
Leave the `pwm` (pulse-width modulation) pin blank, because this specific motor driver’s configuration does not require a separate PWM pin.
Left motor
Click the **+** icon next to your machine part in the left-hand menu and select **Blocks**.
Search for `gpio`, then select the `motor/gpio` block.
Enter `left` as the name or use the suggested name for your motor and click **Add to machine**.
Then select `local` from the **Board** dropdown to choose the Raspberry Pi the motor is wired to.
Select `Encoded` in the **Encoder** section and select `lenc` as the **encoder** and set **ticks per rotation** to `2`.
Next, describe how the motor is wired to the Pi:
Switch the Component Pin Assignment Type to `In1/In2`.
Set **A/In1** to `12`.
Set **B/In2** to `11`.
Leave the `pwm` (pulse-width modulation) pin blank, because this specific motor driver’s configuration does not require a separate PWM pin.
JSON
Add the following JSON objects to the `components` array:
```json
{
"name": "right",
"model": "gpio",
"api": "rdk:component:motor",
"attributes": {
"pins": {
"a": "16",
"b": "15",
"pwm": "",
"dir": ""
},
"board": "local",
"dir_flip": false,
"ticks_per_rotation": 2
},
"depends_on": [ "local" ]
},
{
"name": "left",
"model": "gpio",
"api": "rdk:component:motor",
"attributes": {
"pins": {
"a": "12",
"b": "11",
"pwm": ""
},
"board": "local",
"dir_flip": false,
"ticks_per_rotation": 2
},
"depends_on": [ "local" ]
}
```
### Yahboom
Since both right (and left) side motors of the Yahboom rover are wired together to a single motor driver, you configure the right (and left) side motors as a single [motor component](/reference/components/motor/).
Start with the right set of wheels.
Right motor
Click the **+** icon next to your machine part in the left-hand menu and select **Blocks**.
Search for `gpio`, then select the `motor/gpio` block.
Enter `right` as the name or use the suggested name for your motor and click **Add to machine**.
Click the **Board** dropdown and select `local` as the board the motor driver is wired to.
Next, configure the **Component Pin Assignment** section to represent how the motor is wired to the board.
In the **Component Pin Assignment** section of the right motor card, toggle the **Type** to **In1/In2** to use the compatible mode for this motor driver.
If you followed the setup instructions for putting together your Yahboom rover correctly, you can set the **pins** as follows:
`a` to `35`
`b` to `37`
`pwm` (pulse-width modulation) to `33`.
Leave `dir` pin blank, because Yahboom’s motor driver uses an a/b/pwm configuration.
Click **Show more** and set `max_rpm` to `300`.
You can ignore the other optional attributes.
Left motor
Click the **+** icon next to your machine part in the left-hand menu and select **Blocks**.
Search for `gpio`, then select the `motor/gpio` block.
Enter `left` as the name or use the suggested name for your motor and click **Add to machine**.
Click the **Board** dropdown and select `local` as the board the motor driver is wired to.
Next, configure the **Component Pin Assignment** section to represent how the motor is wired to the board.
In the **Component Pin Assignment** section of the right motor card, toggle the **Type** to **In1/In2** to use the compatible mode for this motor driver.
If you followed the setup instructions for putting together your Yahboom rover correctly, you can set the **pins** as follows:
`a` to `38`
`b` to `40`
`pwm` (pulse-width modulation) to `36`.
Leave `dir` pin blank, because Yahboom’s motor driver uses an a/b/pwm configuration.
Click **Show more** and set `max_rpm` to `300`.
You can ignore the other optional attributes.
### Other
Follow the instructions for the [model of motor](/reference/components/motor/) your rover uses to configure your motors and configure at least a `right` and a `left` motor.
#### Test the motor configuration
> **Caution:**
>
>
>
> Ensure the rover has sufficient space to drive around without hitting anyone or anything.
>
> If you don't have enough space, consider holding your robot off the ground so it cannot collide with anything unexpected.
>
>
Now that you have configured your motors, you can actuate them.
Make sure your machine is turned on.
Navigate to the **Control** tab.
You'll see a panel for each configured component.

Click on the panel for the right `motor`.
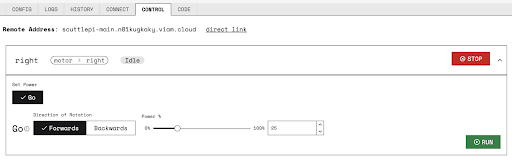
Try changing the motor's **power** level and click **Run**.
> **Caution:**
>
>
> Be careful when using your motors!
> Start with the power level set to 20% and increase it incrementally (about 10% each time) until the wheel rotates at a reasonable speed, clicking **Run** at each increment.
> If you hear a "whining" sound from the motor, the power level is not high enough to turn the armature.
> If this happens, increase the power level by 10% increments until it starts to turn.
>
If your wheel turns in reverse when it should turn forward, add the `dir_flip` attribute to the motor's configuration, by clicking **Show more** and setting the attribute to "true."
There, you should see a panel for the right motor: you can use this panel to set the motor's power level.
## (Optional) Configure the camera
Optionally, add a camera to your rover.
### Config Builder
Click the **+** icon next to your machine part in the left-hand menu and select **Blocks**.
Search for `webcam`, then select the `camera/webcam` block.
Enter a name or use the suggested name for your camera and click **Add to machine**.
Leave the **video_path** blank and the camera will use the default video path for your machine.
If this doesn’t work when you test your camera later, you can try a different video path by following the prompt in the camera’s configuration panel.
### JSON
```json
{
"name": "Webcam",
"model": "webcam",
"api": "rdk:component:camera",
"attributes": {
"video_path": ""
}
}
```
If your rover has its camera mounted on a pair of [servos](/reference/components/servo/), like the Yahboom rover, you can use these to control the pan and tilt of the camera.
Click the **+** icon next to your machine part in the left-hand menu and select **Blocks**.
Search for `rpi-servo`, then select the `raspberry-pi/rpi-servo` block.
Enter `pan` as the name and click **Add to machine**.
Set `Depends On` to `local`, and `pin` to the pin the servo is wired to (`23` for the Yahboom rover).
Finally, add the tilt `servo` as well.
Click the **+** icon next to your machine part in the left-hand menu and select **Blocks**.
Search for `rpi-servo`, then select the `raspberry-pi/rpi-servo` block.
Enter `tilt` as the name and click **Add to machine**.
Set `Depends On` to `local`, and `pin` to the pin the servo is wired to (`21` for the Yahboom rover).
### Test the camera stream
Once your camera is configured and connected, expand the **TEST** panel on the **CONFIGURE** or [**CONTROL**](/monitor/default-interface/#web-ui) tabs.
If everything is configured correctly, you will see the live feed from your camera.
{{< imgproc src="/components/camera/example_camera_image.png" alt="Example Camera view" resize="800x" style="width:500px" class="imgzoom shadow" >}}
## Configure the base
Next, configure the [base component](/reference/components/base/), which describes the geometry of your chassis and wheels so that the software can calculate how to steer the rover in a coordinated way.
Configuring a [base](/components/base/)
component also provides you with a nice UI for moving the rover around.
> **Note:**
>
>
> Viam supports most rovers with built-in models like the [`wheeled`](/reference/components/base/wheeled/) base.
> If your rover is not supported out of the box, follow the [Create a Modular Resource to Control a Rover](/tutorials/custom/controlling-an-intermode-rover-canbus/) tutorial to create a model for your rover or mobile robot.
>
### Config Builder
Click the **+** icon next to your machine part in the left-hand menu and select **Blocks**.
Search for `wheeled`, then select the `base/wheeled` block.
Enter a name or use the suggested name for your base and click **Add to machine**.
SCUTTLE
Select the motors attached to the base in the fields as your **right** and **left** motors.
Enter `250` for `wheel_circumference_mm`.
Enter `400` for `width_mm` (measured between the midpoints of the wheels).
Yahboom
Select the motors attached to the base in the fields as your **right** and **left** motors.
Enter `220` for `wheel_circumference_mm`.
Enter `150` for `width_mm` (measured between the midpoints of the wheels).
Other
Select the motors attached to the base in the fields as your **right** and **left** motors.
Measure the wheel circumference in mm and enter it in the field for `wheel_circumference_mm`.
Measure the width in mm between the midpoints of the wheels and enter it in the field for `width_mm` (measured between the midpoints of the wheels).
### JSON
```json
{
"components": [
{
"attributes": {
"board": "local",
"pins": {
"pwm": "",
"a": "16",
"b": "15"
}
},
"model": "gpio",
"name": "right",
"api": "rdk:component:motor"
},
{
"attributes": {
"board": "local",
"pins": {
"pwm": "",
"a": "12",
"b": "11"
}
},
"model": "gpio",
"name": "left",
"api": "rdk:component:motor"
},
{
"attributes": {
"left": ["left"],
"right": ["right"],
"wheel_circumference_mm": 250,
"width_mm": 400
},
"model": "wheeled",
"name": "your-wheeled-base",
"api": "rdk:component:base"
}
]
}
```
Save the config by clicking **Save** at the top right of the page.
### Test the base
After you configure the base, open the base's **TEST** panel on the **CONFIGURE** or [**CONTROL**](/monitor/default-interface/#web-ui) tabs to view the controls to enable keyboard or discrete control over your machine's movement.
{{< imgproc src="/components/base/base-control-tab.png" alt="The base component in control tab" resize="800x" style="width:500px" class="imgzoom" >}}
In the **Quick move** section, you can toggle the keyboard control to active.
With the **Keyboard** toggle active, use **W** and **S** to go forward and back, and **A** and **D** to arc and spin.
Try driving your base around using the WASD keyboard controls.
{{% alert title="Caution" color="caution" %}}
Ensure that your robot has sufficient space to drive around without hitting anyone or anything.
{{% /alert %}}
You can also move straight, spin, set power or set velocity from the base panel.
If you do not see the base card in the **TEST** panel, check the **LOGS** tab for possible setup or configuration errors.
## Next steps
Now that you have fully configured your SCUTTLE robot, you can drive it around and view its camera stream.
To take things to the next level, check out one of the following tutorials:


